


Replace nozzle sensor

Disassemble the printhead
- Follow the instructions of the manual in chapter 7.4
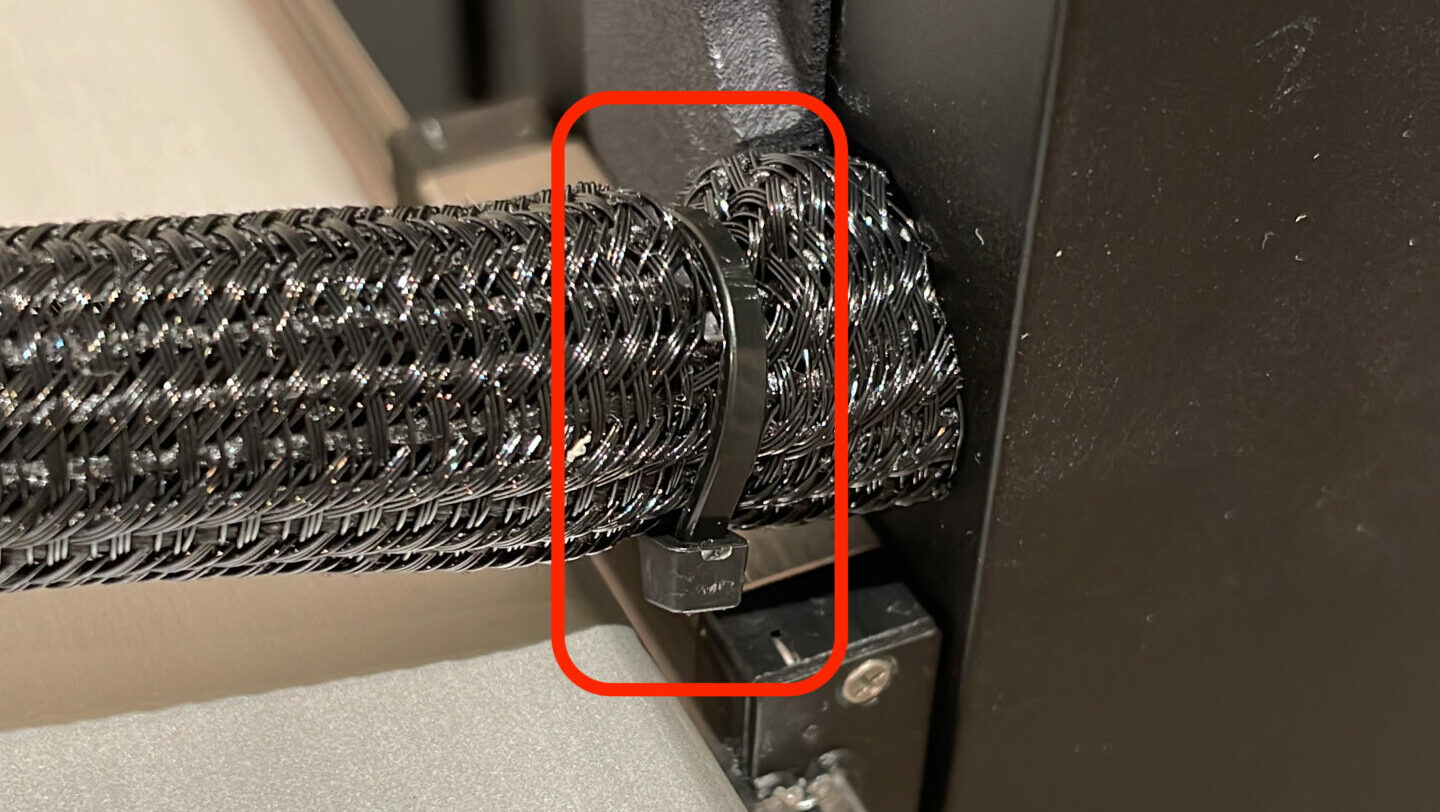
Cut zip tie
- cut the zip tie in the rear of the printhead with a scissor or small wire cutters
- be careful not to damage anything!
- peel back the cable sleeve a little
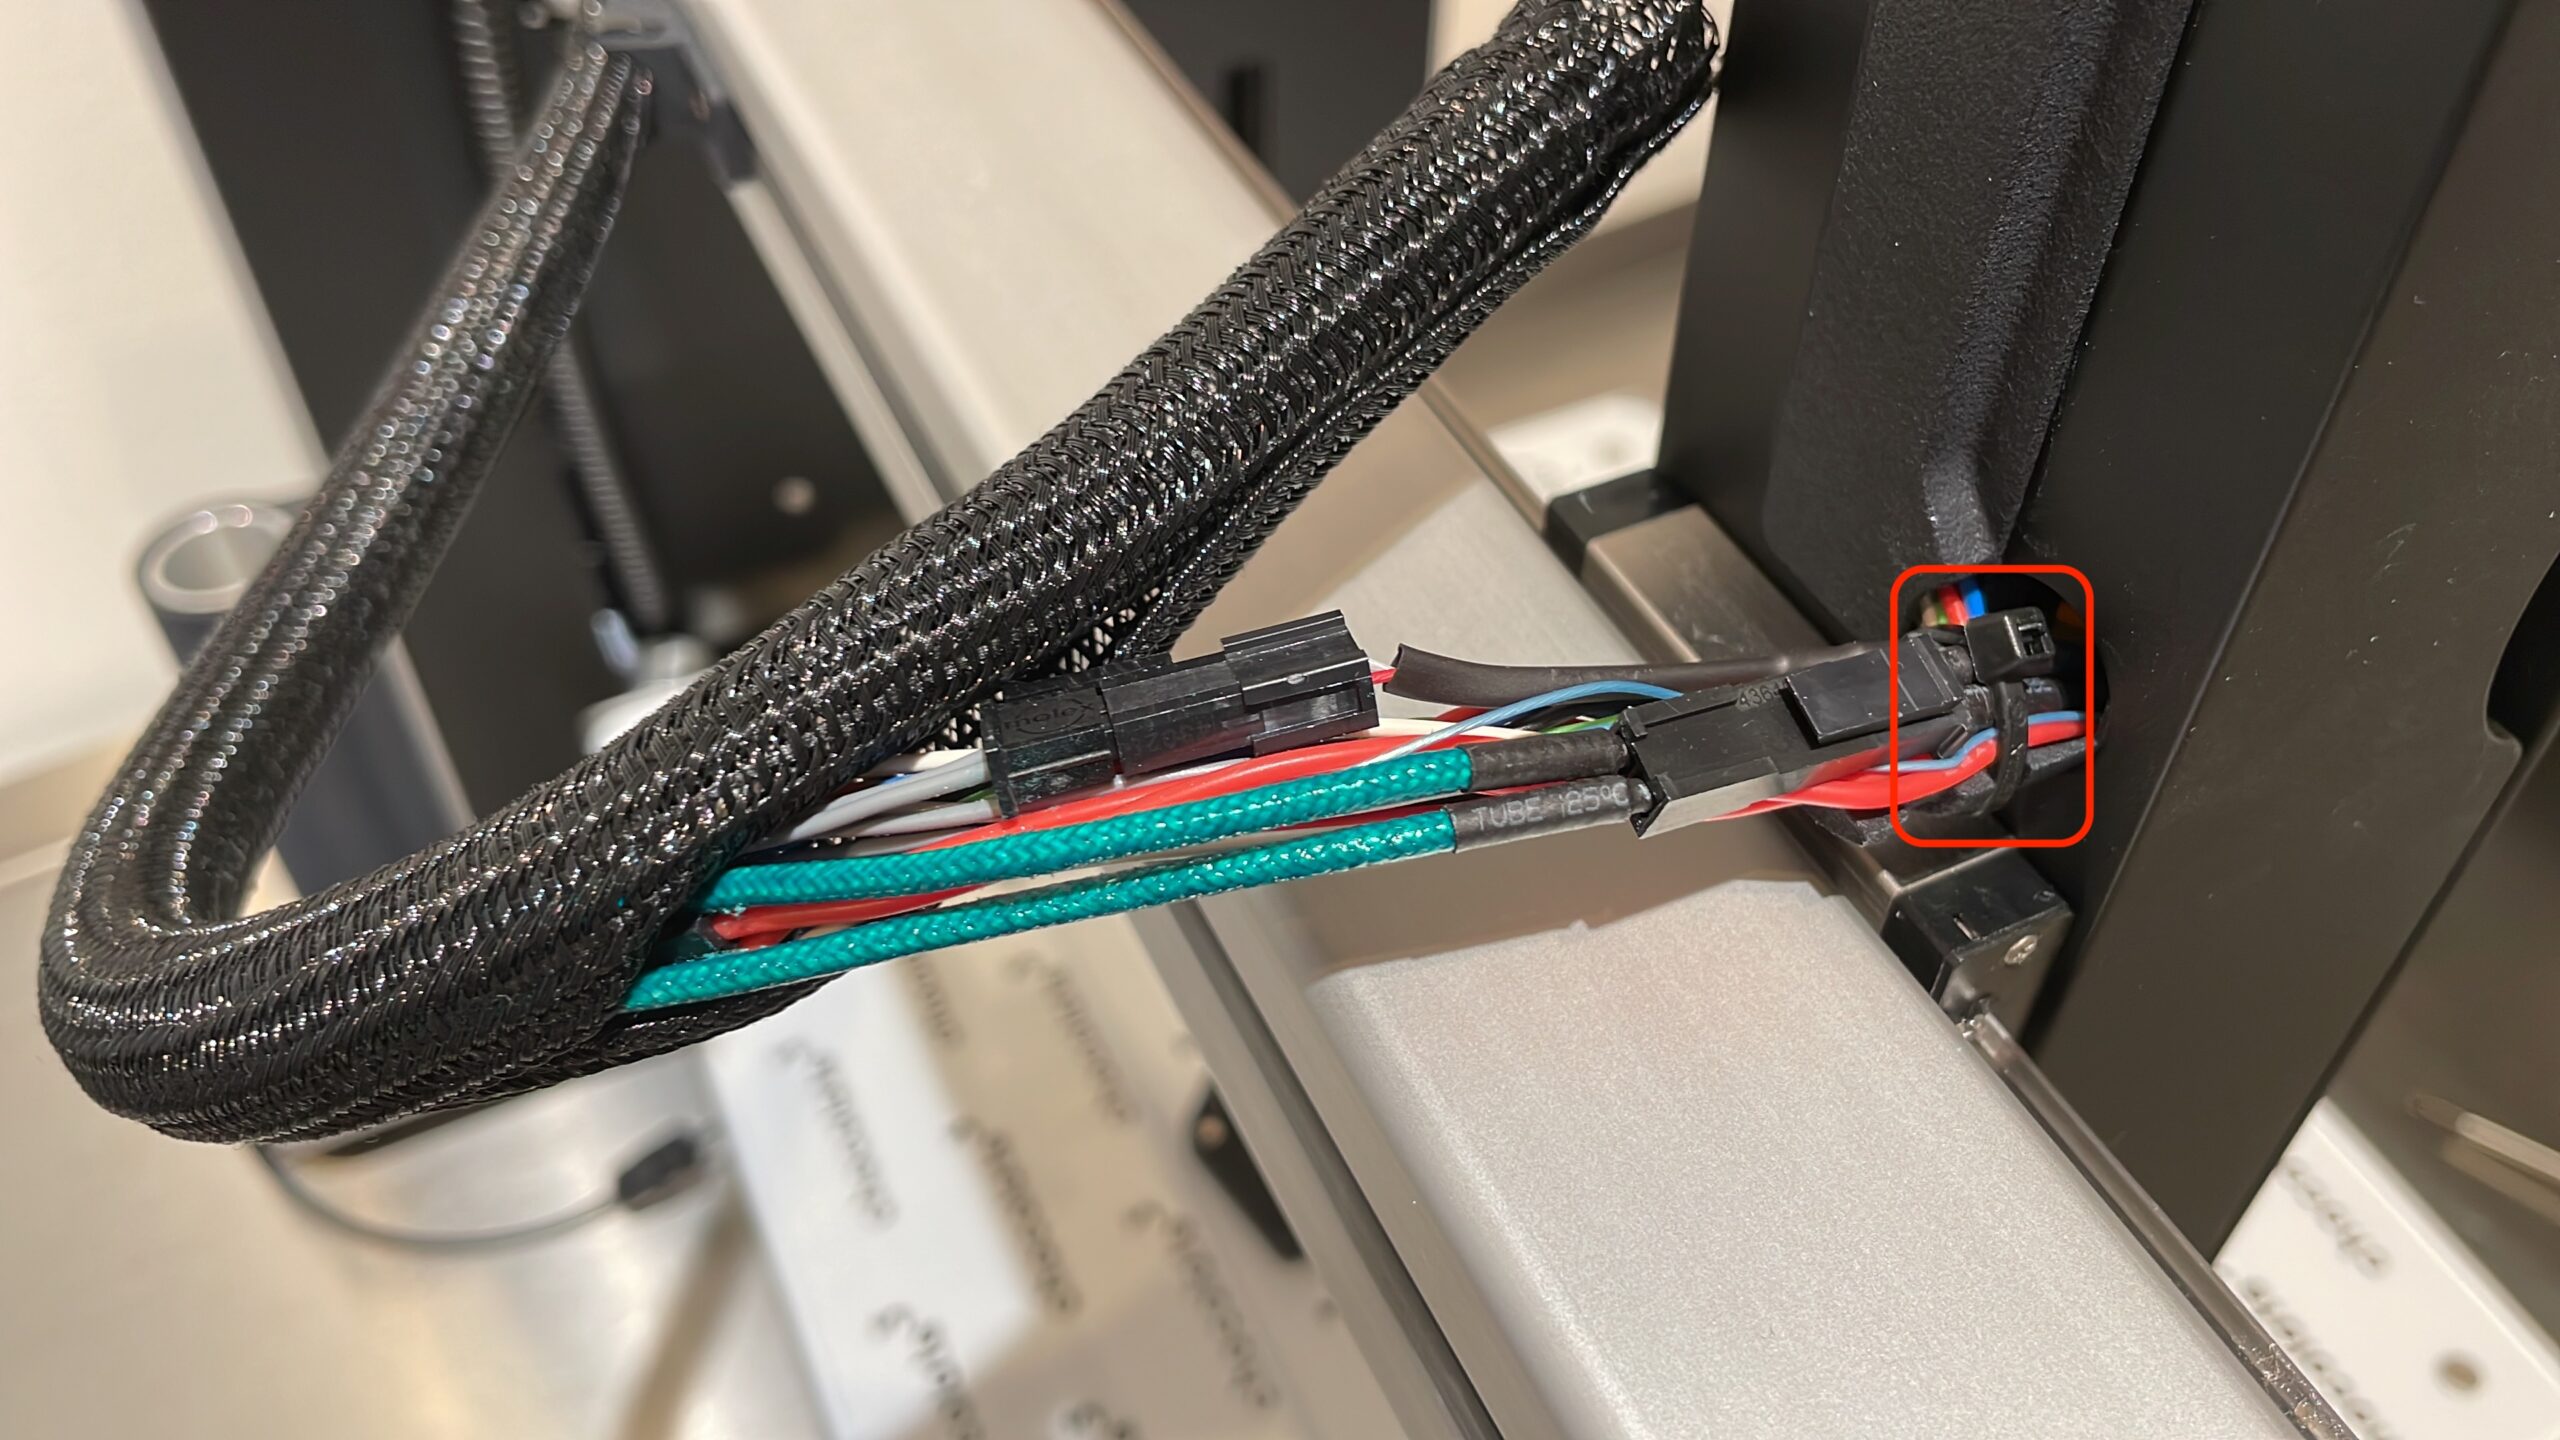
Cut second zip tie
- carefully cut the now unveiled zip tie
- be careful not to damage anything!
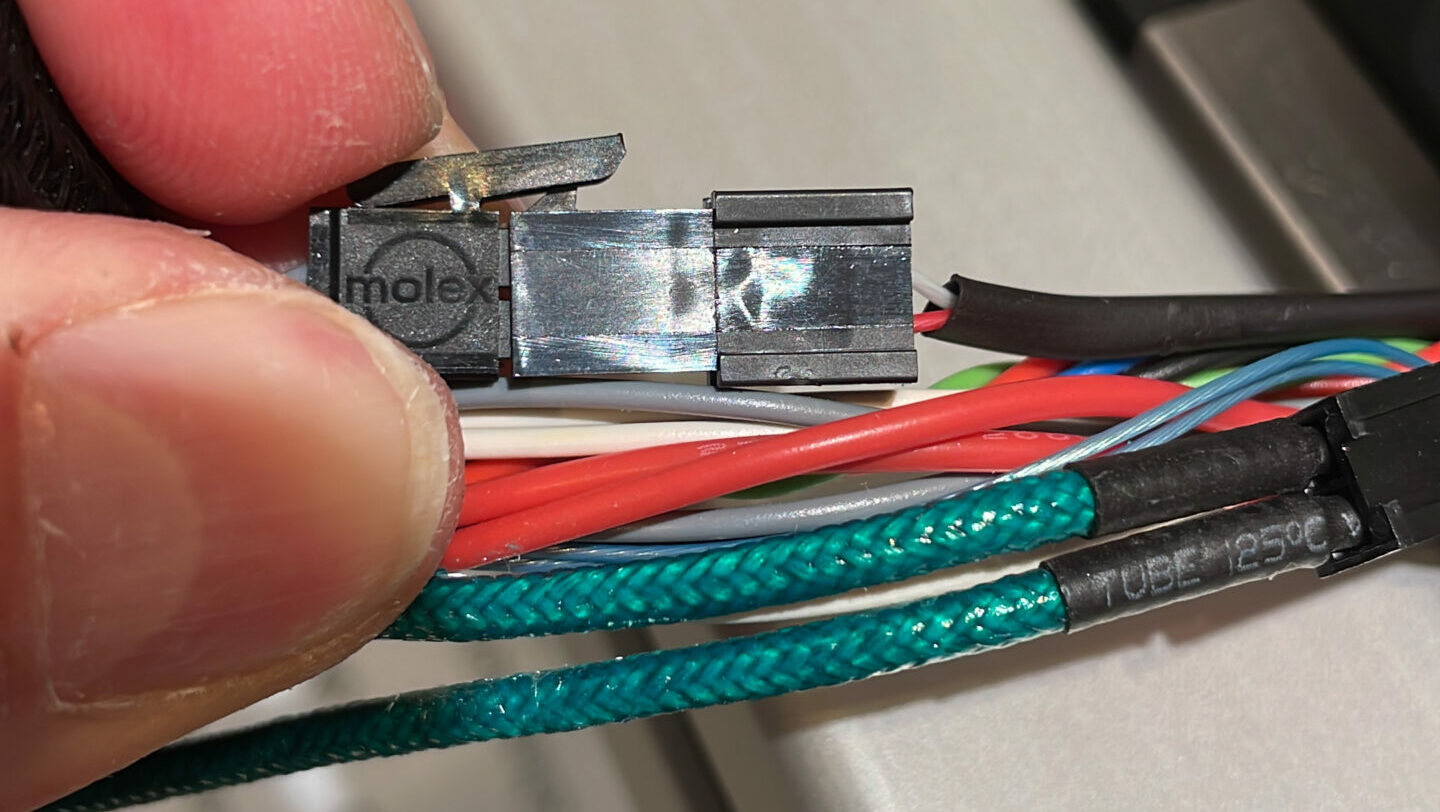
Unplug sensor
- unplug the sensor by pressing the little leaver on the side
you can leave all other cables connected - remove the sensor and replace it with a new one
- make sure the sensor is plugged in well
Reassemble printhead
- reassemble the printhead in the reverse order as outlined in step one
- do not attach any zip ties yet!
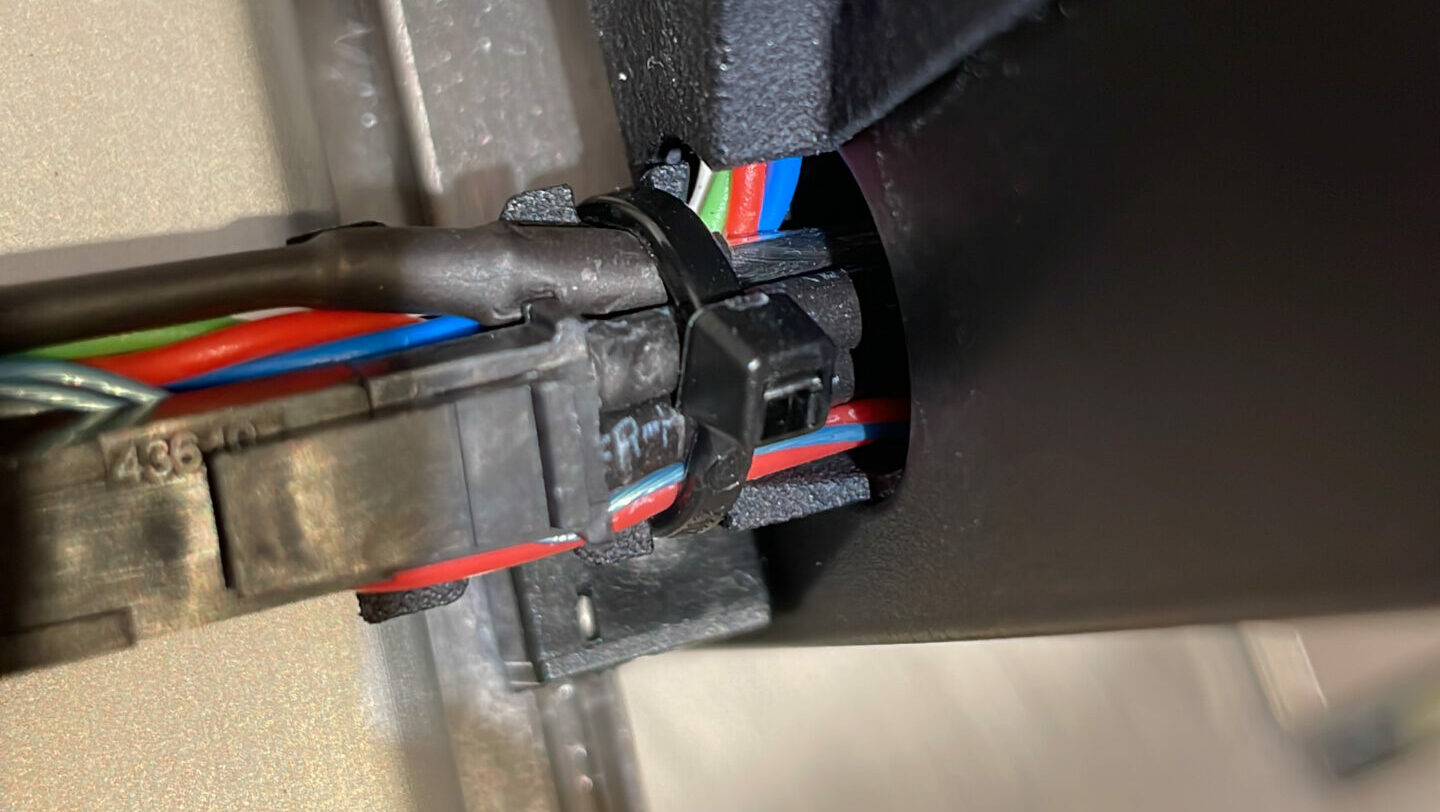
replace first zip tie
- replace the first zip tie with a new one
- make sure there is no tension on any cable with the printhead opened and closed
- the zip tie goes into the grove facing the prithead
- do not over tighten the zip tie but make sure the cables are held in place nicely
- cut the excess of the zip tie away
Reassembly
- close the cable sleeve back up
- secure it with a new zip tie
- the zip tie is supposed to rest in the grove facing the rear
- do not over tighten the zip tie but make sure the cables are held in place nicely
- cut away the excess of the zip tie
Testing
- turn the printer back on and check temperatures
- if needed calibrate the new sensor